 |
Job done with the fitted
angle block as its
crowning glory. |
To avoid doing this job at all, an alternative would be to buy an MGA, no window glass and its accompanying seals to deal with, otherwise, read on.
See related post==> MGB GT Teal Blue Refurbish Project Car Pt 1
Door and window rubber on the GT were in a sorry state, hard and brittle. Time to be replaced, and If that rubber is shot, then so too will the channel rubber that the door glass slides up and down in. Order it at the same time, or if you don't for whatever reason, (I thought mine were ok till I got a closer look), I got them from a local supplier, it is a very common type and is called "Bailey Channel", there are 4 sizes, the MGB is the second smallest. It's available in Australia from good old Clark Rubber, who stock over 100 different car rubbers and seals, otherwise another rubber and seal supplier, or wait another week for an order to arrive from the UK. And do order the gasket between the frame and trim piece. Also, get some non-curing mastic and new rivets from your hardware.
Here is a link to part 1 and part 2 of an excellent YouTube vid on how this is done, very handy. I followed this procedure with only 1 or 2 minor departures.
Follow the steps in the vids, a departure will likely require going back a step to do it again? It is one of those jobs that is a slow and patient process. After completing one door the next will be a lot easier but it still takes time, for example, the quarter window glass is best held in place with it's frame and new rubber with clamps overnight. The driver's door was off the car so I did that one on the bench, the passenger door was done on the car and I found it much easier as the door was held in situ. I won't describe the procedure step by step as the YouTube vid does that, but I'll note key points to take notice of.
 |
Bolts came
off easy. |
I soaked all the nuts and bolts in CRC a couple of days prior to starting the job. The 1st two bolts that come out allow the rear side window glass channel to be taken out. Paying attention to how this comes out will be handy for when it has to go back in, which will take some maneuvering to get it lined up and secured again.
Take note how the 2 attaching points on the window glass rail slips out of its channel, it will be useful for when it goes back in. Fitting the glass back in the door that was still on the car just fell into place easily and was much easier than the door I did on the bench which required me having to hold the door as well as locate the channel. I didn't replace the rubber in the window class channel, although it was old and brittle, it was not going to budge and come apart so I decided it was best left there. Grease up both rails on this channel before putting it back in.
 |
Mastic applied
to the door.
|
In the vid he didn't take off the top trim piece that holds the window weather seal rubber which is secured to the door by rivets. This is one of my departures as I found it necessary to take this off for two reasons. Firstly the quarter window frame comes out a lot easier together with this piece, and secondly the frame goes back on a lot easier with this trim piece held together. It's because of the odd angle of the bolts and spring tensioner, if that trim is on the door the holes don't line up when you try to marry the frame to it because of the angles, so hold that trim to the frame and marry these two pieces to the door and it will go back in smoothly. The bonus is you get to clean up the trim piece, polish up the duco under it, put a new bead of non-curing mastic between the door and the trim piece, new gasket between the frame and trim piece and put it back with nice shiny new rivets. Yippie!
 |
I drilled slightly larger holes
for the new rivets.
|
When you put in the new Bailey Channel, notice that the one taken out had a couple of spots of clue. Put a few dots of glue to hold the new Bailey Channel in place. Some months down the track the thought of this sliding down the channel and me having to open it all up again to fix it would not be a good outcome, no sir eeee, gluing it now is a good idea.
 |
The old rubber was brittle
and crumbled out.
|
Quarter window rubber weather seal. It's an ideal time to clean up and polish the frame. When fixing the new rubber in, the use of dishwashing detergent readily available from the kitchen acts as a great lubricant to help the new rubber to slide and pop into place, starting at the top of the frame and working your way down. Job done and it will be gratifying compared to the hard brittle stuff you took out.
 |
Nice soft rubber.
|
 |
| In the vice. |
Gently pry apart and separate the quarter window glass from it's 2 sided frame. Putting it back together I found it best to hold the frame in a vice, try to put the new rubber in the channel and hold it in place as best as you can with pegs or small clamps. Doing the second door I discovered it was easier to firstly jam in the little semicircular chrome piece into it's corner, holding it in place so it doesn't slip out, and slowly marry the glass to all this. Be mindful of the length of rubber, keep trying to stretch it out as you go so it won't come up short, all the time using the dishwashing detergent as a lubricant. The glass will want to keep sliding and popping it's way back out, keep working it in and down, when it gets closer to where it needs to be, apply some clamps to press it all the way in. Once it is all the way in I found it best to leave it clamped over night. The next morning the excess rubber can be trimmed with a sharp blade. Tighten the sprung bolt that puts tension on the glass within its frame so it will stay open when driving along and not blow shut.
 |
Clean up time.
|
 |
Sound deadener.
|
While the door was free of its burdensome parts it is a good opportunity to give it all a thorough clean up inside and out. Some degreaser for greasy parts and orange based cleaner gets it done. I hit a couple of small surface rust spots with a rust treatment, primed with red oxide, undercoated and touched up the paint with a spray can prepared by my local automotive paint store. I took the opportunity to also apply some additional sound deadening, surface cleaned with isopropyl so the self adhesive strips stick well.
 |
CRC makes getting these clips
off easier
|
The door glass weather strip. A light spray with CRC gives it some slip, gently tap the little spring clips off, I used a jeweler's screwdriver and a small tack hammer then grabbed with needle nose pliers.
Put the new weather strip on after putting the frame back in but before the glass goes in to trim and align it properly. Putting those little spring clips back on is fiddly, the combination of holding the clip with needle nose pliers,
twisting a flat blade screwdriver to gently get the clip started, and finally multi grip pliers to bed it into its right place. Use more dishwashing detergent to lubricate the new weather strip so the window glass going up and down as you test it won't grab.
 |
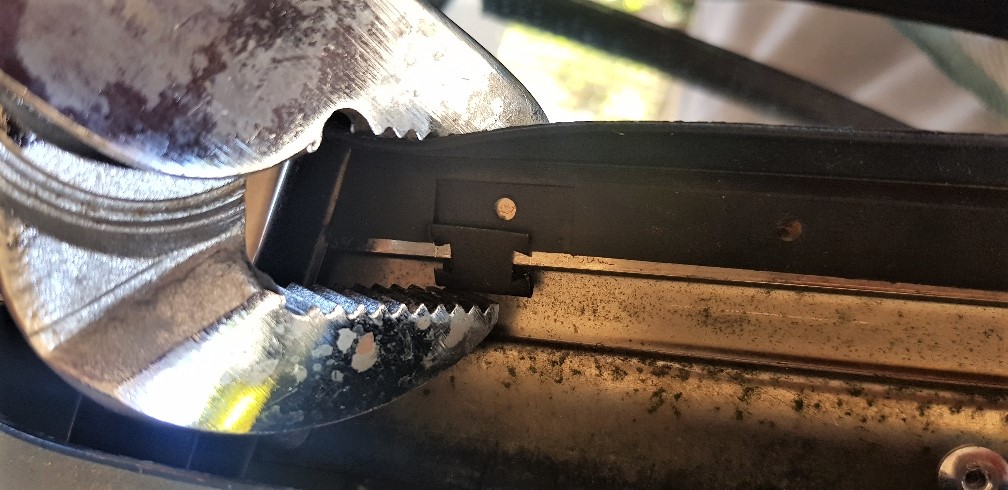
Multi grips beds the clip in.
|
Putting it all back together I put a dab of copper grease on all the nuts and bolts to make it easier in the event that someone else does this job 40 or 50 years down the track. Ummm, maybe that's not likely, but who knows?
Take the time to oil up the window winding mechanism, all the joints and grease the cog behind the window winding handle inside. And I hope you ordered the top rubber trim that crowns the window glass and frame in all its glory, now is a good time to fit it. (See top picture.)
 |
Nice soft new weather seal.
|
Happy door window glass rubber and seal replacements(:


Comments
Post a Comment